Note : this tutorial allows you to create clothes without crushing the cloned version.
To create custom skins for your clothes with Color Magic 5.2, you need the following software:
- S4PE (be careful, the archive must be opened with 7-zip otherwise the installation will be wrong)
- a software opening .dds (Photoshop CSx with DDS texture tools from NVIDIA / Gimp with DDS plugin from NVIDIA / paint.net)
Create the starting package
- Launch Color Magic and click on "next".
- Choose your version of CuS (full game or demo)
Warning: the clothes created for the demo do not always work with the full game. - Enter your nickname and press "next
- Choose the garment you wish to modify and press "next".
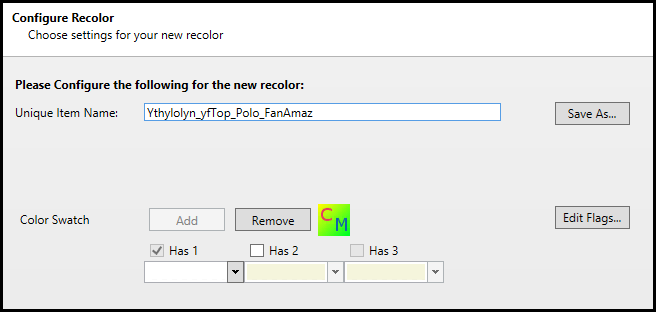
For my part, I chose a white polo shirt - In Unique Item Name, put the name of your future creation
- In Color Swatch, choose the future color and click on Add (to add an icon to your creation)
- Then click on "Edit flags". This is another important step: it will create relevant criteria for the Create-a-Sim filters. Edit the Color category according to the color of your garment (here: white/white). If needed, add another Color value by clicking on Add, then selecting "Color".
- Click on "Finish" and save your package
Retrieve the texture file
- Open S4PE
- In " File ", do " Open " and select your newly created package
- A number of resource files are displayed. Select the one that opens the image of your garment in the preview
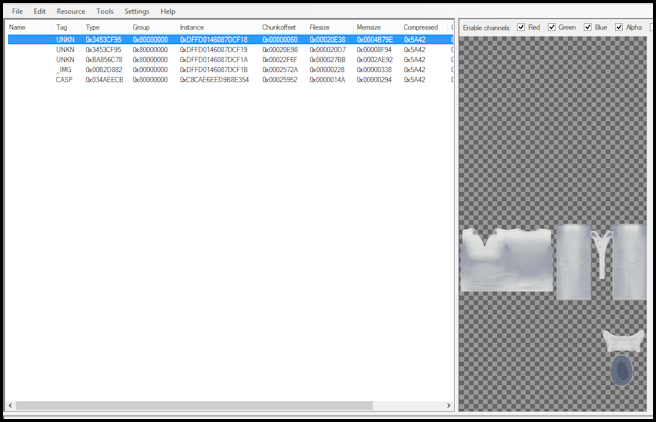
- Right click on the file and choose "export to DDS".
- Register your DDS with the name you want
Create your own garment
- Open your DDS with the software of your choice
- Change the texture, patterns or colors of your garment
Attention don't change the shape! - For my part, I opened the garment with paint.net and I applied a pattern created with PSP
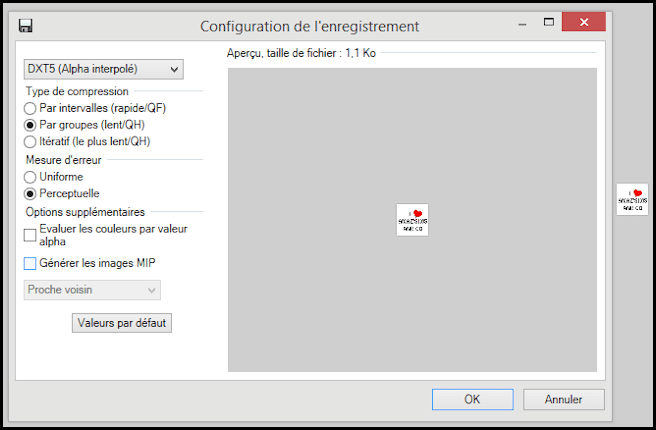
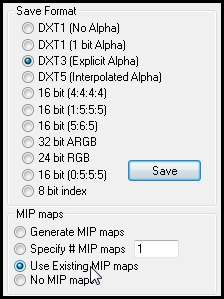
- Save your garment as .ddsWith Paint.net, I use the following configuration:

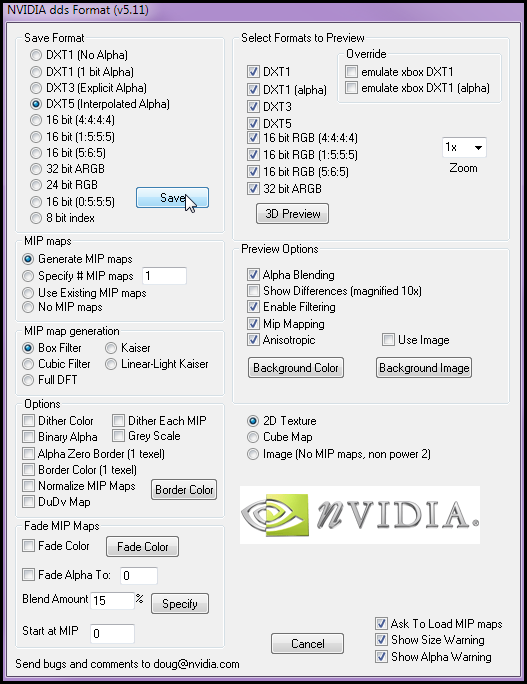
With Photoshop, Platinum Simmers recommends the following configuration:
Import the DDS into your package
- Go back to S4PE and select your texture again
- Right click, select "import from DDS" and choose the file you just modified
- In S4PE, right click on the _img file, select "export" > "to File..." and save without changing the name
- Open the file in your editing software (This is the color icon that will appear in the game)
- Modify the file as you wish. For my part, I put the logo in
- Save your creation as .dds with the following parameters:
- Close your retouching software
- Go back to S4PE, select the _img file, right click, and select "import"> "from file... ".
- Press "OK".
- Click "Save" and close S4PE
The moment of truth...
- Place your package in the following file:
C:\Users\Name\Documents\Electronic Arts\Les Sims 4\Mods\ - Start your game
- Look for the garment you cloned and select your icon from the different textures
- If all goes well, you will be able to put on your garment with your design!

Attention, there has been a new version of Color Magic, please update.
Hello
After reading other tutorials (especially Sandy's), I add a step in the creation of the package :
Then click on "Edit flags". This is another important step: it will create relevant criteria for the Create-a-Sim filters. Edit the Color category according to the color of your garment (here: white/white). If needed, add another Color value by clicking on Add, then selecting "Color".
A small remark following a question I was asked: the clothes created in this way do not overwrite the version you have cloned. They are added as a surplus in the colors.
the creators drew faster than their shadow on the mods it should be said![[sims 4] Change clothes with Color Magic 5.2 and S4PE 2620358557](https://amazsims.fr/wp-content/uploads/wpforo/emoticons/divers/divers-blague.gif)
Thank you, it's very cool to have such a tutorial in French so early since the release of Sims4![[sims 4] Change clothes with Color Magic 5.2 and S4PE 1431192536](https://amazsims.fr/wp-content/uploads/wpforo/emoticons/divers/divers-super1.gif)
the creators drew faster than their shadow on the mods it should be said :p